Giovanni

Giovanni

Wednesday, June 20, 2018

Time to get to Work


I knew Brandon was serious about working on the Fiat when he woke himself up at 7 am, all on his own.  We headed over to the storage lot and picked up the trailer.  Brandon drove, his first time pulling a trailer.  I ended up backing it into the driveway.
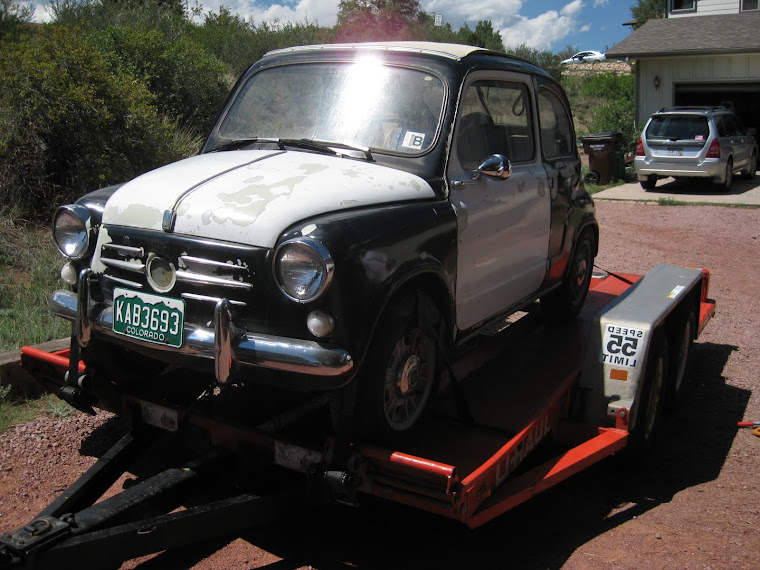
Car is unloaded into garage and ready for work to begin.


The first step, after unloading the car, was to empty the car of all the parts stored inside.  These parts were laid out across the driveway.


Brandon is ready, mask on for dust and allergies.  Its a bad allergy day.  

Time to get to work.  We knew that the drivers side floor would need replacing, so we scraped all the crud and used a shop vac to clean up the mess.  After a couple hours of scraping and cleaning, we determined that the drivers side and passenger side floor pans need to be replaced.  

Brandon shop vacs all the debris from the floor to see what condition its in.

Josh, Brandon's friend and fellow robotics team member, show up at 10 to help out.  First step, get in the truck and go get some breakfast and then head to Home Depot for some supplies.  Part of the payment for working on the car is food, a necessity for any teenager.  Also, everyone who works on the car will get to drive it.  

At Home Depot we purchased some tools we were missing (projects like this are always a good excuse to buy new tools!), as well as a rolling wire shelf unit to store car parts. 

Once we were back at our garage, Josh took on the disassembly of the engine while Brandon and I continued to clean out the interior of the car.  We also pulled the gas tank and started cleaning the hood compartment (on a Fiat 600, that's where the gas tank, spare tire and battery are located).  The engine in in the rear. 
Josh took on the disassembly of the engine

Josh made progress on the engine.  Another friend, Roen showed up around 1 and started working on cleaning parts coming off the engine.  It's a messy project.  Danielle showed up later and she helped with some parts cleaning, as well as some additional  new tool runs with Brandon.  Oh, and rags, lots and lots of rags.  

Brandon spent some time in the afternoon figuring out how to clean a gas tank.  

Today's Crew:  Josh, Brandon and Roen (not pictured, Danielle who left early...something about having to work).

We finished up the day around 5:30 pm, cleaning up the garage so we can use it for other things and our dog could get back in.  She normally has access from the side door.  

Parts have been ordered from the Mr. Fiat website:  two floor panels, a fuel sending unit and an engine gasket set.  

Tuesday, June 19, 2018

Work on Giovanni Begins Again...

For Father’s Day we drove up to McMenamin’s Grand Lodge in Forest Grove to see the Micro and Mini Car Show. It was awesome. We saw a lot of cool cars, including several Fiat 500’s and 1 Fiat 600. We met Eric Noon at his orange Fiat 600. Eric was very gracious even offered us a ride in his car. We thought he was going to take us, but he was very trusting and gave me the key and had Brandon sit int he passenger seat and sent us on our way. We did a loop around the block and we were hooked. Time to take our Fiat out of storage. We talked about plans for the Fiat all afternoon and all the way home to Corvallis. That evening Brandon and I packed op the LEGO layout and the model train modules to make room for the Fiat.  Brandon texted two of his robotics buddies and they agreed to help...for donuts and snacks.  Our summer project kicks off on Tuesday morning.


This is the Fiat 600 owned by Eric Noon, the one we got to drive.  

Friday, November 2, 2012

Removal of the Engine

Today I finally did it.  I removed the engine from the Fiat.  I supposedly had only 4 bolts remaining until the engine could come out (according to the manual), but I ended up having several more in very difficult locations.  I did get it out and it only took 2 hours.  


Then engine compartment in the rear of the car.  Notice the transmission in the middle and the radiator on the right.  The rear body panel comes out so that the engine can be pulled straight out the back.


Here is is, the mighty 4 cylinder 767 cc (46.8 cu in) engine.  Top speed = possibly 68 mph.  


Close up the the connection to the transmission.  


Radiator fan and pulley


Another view of the engine compartment.  

Plans for next week:  continue to clean out the interior, begin stripping EVERYTHING off the body.  

Friday, October 26, 2012

Dis-assembly Continues


Every Friday has become "Fiat Friday" lately.  I have Fridays off from work, so its a good time to work on the car.  I spent much of today reorganizing the garage.  After a large garage sale last September, I still can't figure out how we have so much stuff?!  

I was able to setup an 8ft table along the far wall of the garage.  This will be one of my work areas.  I also plan to setup some shelves to store and catalog all  the parts I am taking off of the car.  

After a few hours of reorganizing and cleaning, I finally got to work on the car.  Today I continued to pull out all the liners, rubber mat lining and other debris inside the car. 


This is a tow bar that Jack, the previous owner, built for the Fiat.  I'm not sure what I will do with it.  If I need to move the car, I have a cargo trailer in which it will fit nicely.  


After cleaning out more of the interior, I decided to take off the canvas top.  Yes, Giovanni has a soft top sunroof!  I needed to take this off so I have more access to the interior, and so that I can keep it in good shape.  


Here is the canvas top folded partway back.  There is a leather strap at the back that is used to tie down the top when driving.  You can see Katrina's Metropolitan Scooter in the background.  We are thinking of a red and white, or an orange and black paint/interior scheme for Giovanni.  

I still need to pull the engine, but am waiting for a few essential tools.  In the meantime, I will continue to strip the car down to its shell.  

Saturday, October 6, 2012

Cleaning and Dismantling

I've been working on the Fiat a little bit this week.  I have Thursdays, Fridays and Saturdays off from work.  It looks like Fridays, and sometimes Saturdays, will be Fiat days.  I'm excited to get started, but also a little overwhelmed.  I've never done anything like this.  I've never been a car guy, other than admiring great cars.  I've got a feeling that I'm going to have a steep learning curve ahead of me.  

So, this week I finished cleaning out all the extra parts and junk that was stacked inside the car.  I pulled out the front seats, which weren't bolted down anyway due to rusted out floors.  I also pulled out the back seat.  I'm not sure it will be worth saving, even the frame is rusted and the coils are pretty worn.  We may have to have a new seat cushion made.  


This is a picture of the drivers side floor.  See all the rust!  What is hard to see is all the holes in the floor and the sagging that's happening.  I'm not sure if I will make some new floor panels or buy them.  I did find some for sale on a Fiat website, but they are $198 each.  At this point, I'm not sure if this is a good or bad price.  


I had to remove the back seat bench, then fold down the backrest to access the differential.  You can see that I pulled the top two bolts out, getting ready for the engine to be pulled.  


This is the frame bracket that holds the lower rear body panel and the rear bumper.  I had to remove these as well, so that the body panel can be taken off, making room to remove the engine. 


The corner frame brackets have been removed.  On the right side you can see the exhaust.  


I also disconnected and removed the exhaust from the exhaust manifold.  


The exhaust pipes and muffler are removed.  

Next week I will put the rear of the car on jack stands, support the engine, make the final disconnects and remove the engine.  From that point on, I will work on rebuilding the engine, as well as continuing to strip the car down so I can get it ready for body work and sanding.  


Sunday, September 23, 2012

Time to Start the Project

After sitting in our garage for a year and 3 months, its finally time to start working on the Fiat.  I've been busy doing research over the past week:  engine rebuilding, body work, etc.

The plan is to pull the engine for refurbishment, then start working on the body.


The car is still loaded with parts, spare parts and random items.  Notice the suicide door.


The hood contains the gas tank (on the upper left), the battery (hidden under the floor mats in the front), and some storage space.  


Another view of the interior.


The doors will need new linings.


I pulled the old corroded battery and will take it to the battery recycling center where I will get $10 for it.  


It appears that the original battery would have sat in that rectangular whole in the middle.


A close up of the 7 gallon gas tank.  

It spent most of my time taking out the old battery and beginning to sort through all the parts inside the car.  Next time I will finish cleaning out the interior and start disconnecting the engine for removal.  

Today:  1 hour
Total Time:  1 hour


Thursday, October 13, 2011

How to Restore Your Collector Car

I bought a new book from Amazon last week, How to Restore Your Collector Car.

Since we have never even thought about restoring a car until we obtained the Fiat, we really don't know much about the process...or where to start.

Step 1:  Buy a good overall restoration book.

Step 2:  Read and study book

After studying the book, I came away with the overall basic steps:

1. Disassembly
2. Restoring the trim
3. Cleaning, Stripping and Derusting
4. Blasting
5. Metal Repair
6. Smoothing
7. Primer
8. Finish Coat
9. Overhauling Breaks
10. Mechanical Assemblies
11. Wiring and Rewiring
12. Interior
13. Weatherstripping
14. Final Assembly

I know this does not cover everything...but really it does.  All the missing steps are actually substeps of these 14 basic steps.

Now off to step 1, Disassembly...